Skip to content

Belaying

On belay. The art of staying safe while rock climbing

Do not underestimate the importance of a solid, confident belay! A good belayer always has an eye on the climber and is ready to adjust tension or slack at any time while maintaining at least one hand (usually the stronger one) on the brake rope. In climbing there is a big difference between lead belaying and top rope belaying! Lead belaying is a more advanced technique because adjustments may be more abrupt and consequences of a fall may be more severe! Force and distance of a falling lead climber is much higher than force and distance of a slipping top rope climber. Consequently, lead belayers need to be extra aware of:

1. Distance between belayer and wall

My recommendation: the distance should be relatively short (usually between 3 and 12 feet). The closer you are to the wall, the sharper the angle between you and the first piece of equipment. A sharp angle means that in case of a leader fall, you as the belayer will experience an upward pull (vertical) compared to a sideways pull. A sideways pull (horizontal force) is not desired because it pulls the belayer into/towards the wall. Being pulled into the wall bears many risks, such as: sudden uncontrolled stance, increased slack in the system = longer lead fall, tripping over obstacles between belayer and wall, rope burn, risk of letting go the brake and so on. Conclusion: stay close to the wall – guideline 3-12 feet!

2. Weight difference between belayer and climber

As a climber you can weigh double the weight of your belayer! However, the bigger the difference the more caution is to take regarding:
I) the overall protect ability of the route:
If the route is runout with long potential falls – rather pick another route or find a belayer with similar weight.
II) your stance while belaying:
Check your belay area for obstacles. Forces on the (lighter) belayer can be enormous and sudden pulls can be bad if there are rocks or any other tripping hazards in the way.
III)your choice of belay device in combination with rope thickness:
Use a high friction belay device and rather thick than thin rope. Device and thick rope can take away a good amount of friction that otherwise will be extra load to hold. I recommend a rope thickness of at least 10.00mm in combination with a “Petzl Reverso”. As far as tubular belay devices go – the Reverso is for example much thinner than the “Black diamond ATC” (which is otherwise a great device too).
IV) Experience:
The lighter the belayer the more important for him or her it is to assess the consequences of a sudden fall/pull on the harness. Often lighter belayers literally get catapulted up a few feet, which is fine but requires extra attention and expertise to deal with.

3. Rock Terrain

The best belayers in the world are able to assess the consequences of a lead climbers’ fall at any given time and provide the safest solution possible. In combination with the overall protect ability of a climb (#of pieces vs. length of route ratio) – the physical structure of the rock often decides how safe a lead fall can be. Luckily this can change quickly throughout the same climb as it is often dependent on the terrain. Climbs have ledges, roofs, sharp corners or low angle sections. These features have major influences on the consequences of a fall. A belayer has to constantly look up an assess potential route specific hazards. A climber might face a fall right onto a ledge in a certain scenario. If a belayer correctly assesses the scenario, the belayer might give extra slack so that the climber falls longer than usual just to bypass the ledge, which might is a safer landing. Another option would be a tighter belay so that the fall is kept shorter and the landing happens right above the ledge. As you can see there are many options and the experience and ability to assess risks and deal with them go a long way.

4. Lead climbing fall distance formula

The lead climbers fall distance is quickly assessed/calculated by looking at the following factors:
– rope length between last clip and tie in point on harness
– rope stretch (dynamic ropes usually have between 20-30% rope stretch)
– slack in the system
 The formula is as follows:
Actual fall length = rope length between last piece of protection and tie in point x2 + slack + rope stretch.
 Example:  I am 60 feet high up on the wall, my dynamic rope has a stretch factor of 25%, my partner provides appropriate slack, I climbed 6 feet above my last piece of protection, now I fall!
 Fall= 6×2 + (25% of 60 feet) + approx. 3 feet of slack = 6×2+15+3= 30feet
 Here you can see that climbing 6 foot above your last piece could result in a 30 feet fall. Being aware of this formula will constantly give you conclusions on how to conduct an appropriate belay. Stance, slack/tension adjustments, weight difference and so on.

5. Ground fall potential

It sounds bad and is never desired but leader and belayer have to be aware of it. Mostly ground falls occur within the first two pieces of protection of a climb. For that it is really important to know the fall distance formula! Often the climber has already clipped the first piece and now is ready to clip the second piece. In the worst case scenario the climber slips right before being able to clip the second piece of protection and faces a ground fall.

The belayer has to quickly react and there are three things that the belayer can do to shorten the fall and protect him/herself and the climber:


1. Stay out of the climber’s fall line! Many incidents report that climbers have fallen on the belayer simply because the belayer stood right underneath the climber in a ground fall scenario. So look for a safe stance and stay either left or right of the climber’s fall line!
2. Rapidly take slack out of the system! There are many options! If the terrain allows you to launch down to a lower spot while keeping the brake rope locked – this is your best option. Launch/jump of a rock to have your body weight and gravity rapidly take out slack. If you believe that taking rapidly in slack with your hands is enough to prevent a ground fall then be extra quick and do that 🙂
3. If you know that there is no chance of taking out slack them your last resort is to provide a spot! Just like bouldering. With spotting you can influence the way how the climber falls. Generally speaking you always want to direct the fall so that the climber falls on her or his feet.
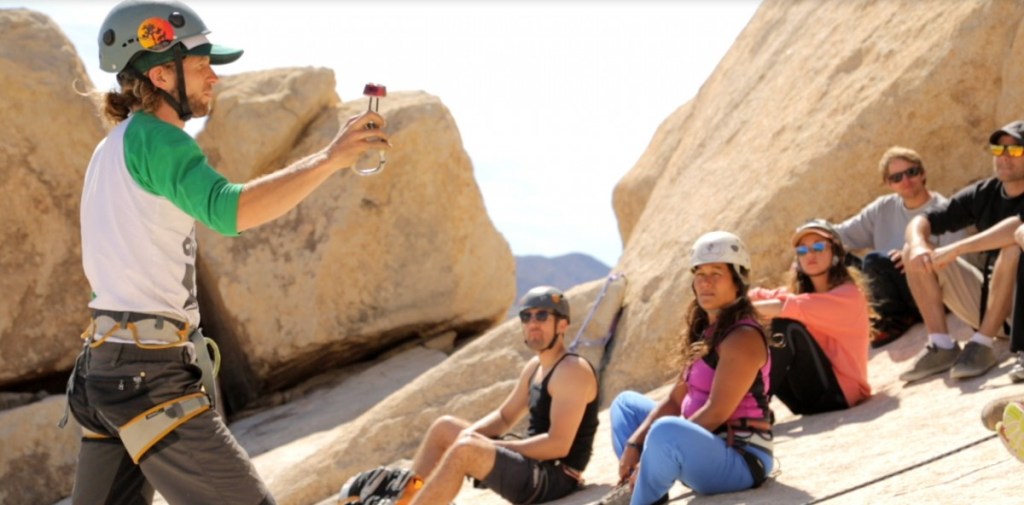
To summarize this – check out the characteristics of world class lead belayers:
– performing partner checks
– assessing the route before climber starts
– looking at overall protect ability of the route such as run outs or distance between bolts
– looking for features that may increase the risk of injury in case of a leaders’ fall (roofs, ledges, corners, etc.)
– having action plans for each lead fall scenario at any given time and being able to implement those plans instantly as they rapidly change during the lead.
Stay safe and explore!

Happy customers

Highly recommend Fabi! He is super organized, friendly and safe. He was on time, prepared with everything we needed, fully explained everything we needed to know and made sure we felt safe during every step. He’s super encouraging and really knows what he is doing!
Anna T.
What an amazing experience! We took the beginners class, and so happy we did, Fabi was very knowledgeable, breaking instructions down step by step making it easier and fun to learn! After learning all the important safety steps we got to climbing right away, with fabi right there giving us pointers on the best route to take. I left class feeling more confident in my abilities to climb. Fabi has such a chill, friendly, and encouraging way of teaching, it felt like we were learning with a friend. I highly reccomend. Thank you for sharing your knowledge Fabi!
Kailyn F.
Had such an incredible time doing my first trad rock climbing multi pitch! Coach Jakob was extremely professional and taught my friend and I so much. We went up over 2,000 feet and got to the top of a stunning mountain in Idyllwild. He was informative and we felt completely safe the entire time. It was a fun and beautiful adventure. We would highly recommend Jakob and Chillino Rock Climbing Group for your upcoming adventures!
Valerie H.
My partner and I just finished an intro climbing class with Chillino and it was fantastic! Our guide was Fabi and he was knowledgeable, friendly, encouraging and always put safety first. A great introduction to outdoor climbing with an emphasis on learning basics the right way and having fun, whatever your skill level. We started with an overview of equipment, a short hike in Mission Hills and a thorough training on using the equipment. We had the chance to do several lines at our own pace. All were a good challenge! Overall, a great class and highly recommend 🙂
Grace M.
Absolutely incredible experience! I hardly have any experience as a climber and Fabian did a great job at showing me the basics and making sure I knew how to safely and adequately climb. There was plenty of time for me to get my hands dirty and the location was beautiful! The team that came along was very positive and encouraging! Would definitely recommend Fabian's climbing options!
Tiffany C.